Friday, March 31, 2006

Inter-facing my fears


So, after I finished up my two drawstring bags I was inspired to figure out how to do a messenger style bag. I liked the one above from one of the Kitty-Craft books and especially this one from Molly Chicken. I was trying to figure out how you box-out the bottom, put them inside out, sew the lining up and still get the flap. So, last night I got two small pieces of fabric and a stapler and practiced until I got this. Grrr.....see next post. I curse you Blogger.

cont...

Isn't it great? That's right, I stapled my prototype. Anyway, this morning I decided to try out the life size version. It took about 2 hours and I got this....

It works but it's got a few problems. It is toooooo wide. The flap is too big and it's all together too floppy. It needs a few tweeks and I hate to admit it but ....interfacing. I don't know how to do interfacing. Here's one more photo for you to laugh at.
Could it BE any wider?
I based the width on Keely's big paperback books. It was going to be for her. But without interfacing, the sides just sort flop out and it is too long. Oh dear.
Alright, so what is the deal with interfacing? Do you cut it the same size as your outer fabric and iron it on and then continue on as normal? or Do you cut it a bit smaller, leaving room for seam allowance and so you don't actually sew on the interfacing? I don't get it.
Anyone willing to give me the scoop here? I hope to try a smaller, non floppy bag this weekend. Hey! Are you still laughing at the freakish photo above? stop. Seriously.
I WAS so proud of myself for figuring it out. Ah well.

Thrifty Finds Friday


Oh you blogger! I'll get you! Stop turning my pictures vertical! I can't make it stop. Well, I had to limit myself this week after last Friday's thrifting pile of mayhem. This week, I got this pretty flower fabric and this groovy big floor pillow turtle. He is like 3 feet wide. I like this guy.

Fabric in the mail

Dear Beki sent me some fabric to play with. Isn't she so sweet? I love getting good mail.
Thank you so much. I will enjoy using it ! Pretty flowers, huh? ;-)

Thursday, March 30, 2006

pretty hair


organization

I've been ready for spring cleaning for a few weeks now, but it has been too cold. In order for good cleaning, the weather must be warm enough to have doors and windows open. So, I've settled on doing organization until the warm stuff comes. I love organizing things. They often don't stay organized, but that is ok because that means I get to organize it again!
Cheap thrills. Anyway, you know those baby fruit plastic containers (shown above)? I love these things. They're small, we have LOTS of them and they have lids. Oh the joy. I use them everywhere to organize everything-scrapbooking stuff, office supplies, hardware. I love them so much I've considering stacking them up, tying them with ribbon and giving them as gifts -thinking someone else would give a hoot about something as cheap and silly as me. I stopped myself from doing this, just so you know.

see?

They are everywhere. Here is the kitchen junk drawer. I'm reorganizing this baby tomorrow. It's looking a bit untidy. I think Keely may have inherited my organizing gene.

Wednesday, March 29, 2006

Maisy-palooza

We had a Maisy afternoon today. Busted out all the books and read them with the Maisy doll. These are cute books. I just found out yesterday that there are movies too. Anyone seen them? I've heard they are cute, sweet, and nice. We like Maisy. There is a neat Maisy website. You can read/look at some of the books online. Keely likes to do that with us. There are also printable coloring pages. A few weeks ago I was going to try and use the coloring pages to draw up some patterns for softies to go along with her book-a Charlie and a Tallulah would be nice.
That's about as far as I got with that.
I don't think I have the knack for softies. It was a nice thought though.

doodle critters

Yesterday, Keely and I were having drawing time together. I got out the big 'ole box of crayons and two clean sheets of white paper and we drew. I turned on some nice music and the sun was shining in our french doors. She was doodling and then told me that I needed to draw a birdie. So I did. She continued to boss me around and told me to draw all of the above animals. She even named two of them. I'm quite fond of my dog and cat here. They are drawn with chunky stubs of crayons and on a bumpy wood table so obviously they aren't the greatest in quality but hey! Now, what to do with my new critters. More cards I suppose.

The Drawstring Bag

Finally- I figured out how to make a drawstring bag all by my lonesome. It occured to me in the middle of the night a few days ago how to sew up the top. It is almost right. The second one is for Keely, so I didn't put any button embellishments on it.

Tuesday, March 28, 2006

fabric fun


This is one of the other "new" fabrics I said I had bought, the Alexander Henry one. I was going to make bean bags out of it, but I couldn't cut it up. Sooooo, I just stretched it over a canvas and put it over Keely's little kitchen table. It's provided much entertainment for us. Sometimes we pick out who we think certain ones look like....this one is grandma, this one is mommy...etc. And the latest fun started by Keely, is picking one of the characters and then posing like they are. It's quite funny. Then we pick another person and we have to make their funny pose. Four hours later...we are still posing. kidding.
Some of their positions are impossible to duplicate since we have bones in our limbs and are not made of rubber. What entertainment we have. This is what you do with no cable, people.

more buttons

Look at all the buttons! This is the second week I've found button/sewing things while thrifting. Weird. Anyway this is A LOT of buttons. This basket is like 4 inches deep and it's full! Those beaded aqua buttons in the front are funky and then the La Mode white card on the right side, those are Holly Hobbie. I used to LOVE my Holly Hobbie doll so I almost cried when I saw those. There are a lot of odd looking buttons and some really old ones. There are some really nifty shiny, stainless steel ones too. Neat. They had about 6 more bags like this but they weren't as cheap as I'd like so I didn't clear them out. I'm pleased with this find.

I couldn't resist....

We had to get out of the house for a short bit, so we ran up to our close thrift store. They had 3 doll cradles. ACK! Three! I thought of all of you ladies and your girls. They were all very nice. 2 of them were way cuter than the one I got last week. Soooo cute and then they had 2 of these high chairs. This one was $3. I could not resist it. The old one Keely already has doesn't have the little lift-up tray. This one does and she is quite amused with it.

Monday, March 27, 2006

Keely as Goldilocks

Awhile ago I found this magnetic fairy tale book that is just too cool. It has about 5 fairy tales in in it. On one page is the story on the other is a magnetic picture. Then it has all these magnets of the characters for each story, so your little one can act out the story while you read it. So cute. Keely has been found of Little Red Riding Hood and Goldilocks since we got it. Then, Capello sent her a little Goldilocks book this weekend and today Keely says, "Let's play 3 bears mommy." Huh? What does that mean? She said, "We have to find 3 bears and a Goldilocks so we can play." Ah-ha. The two year old who wants to act out storylines. right.
So, I found 3 bears, and 3 chairs and 3 beds and she got 3 bowls for porridge and then she ran back for their spoons. She decided she would be Goldilocks. I loosely read the story and she "acted" it out. Watch as the exciting story unfolds before you very eyes.


First the bears are trying to eat their porridge. Having no moveable limbs made this quite a feat, so dear Keely was kind enough to help them out. It was too hot, so they all went out for a walk in the woods (dining room, kitchen... whatever). Then, no longer Keely, "Goldilocks" seeing the bears have left runs in their house and tries out all the chairs.


This girl has no fear. The bears are still RIGHT there and she is already slurping up all the porridge. Fearless and shameless. Then she goes to try out all of their beds. She was liking Poppa Bear's.


Momma Bear's was nice too, no interest in Baby Bear's at all. Instead, she insisted that all the Bears come back and go to sleep in their own beds and she would cuddle with Poppa Bear. She needed to "make him feel better because she ate all his porridge."
There you have it ladies the greatest re-inactment of Goldilocks ever. So dramatic. Were you on the edge of your seat? She'll be performing in the Blue Room all this week.

Weekend Update, definately NOT with Tina Fey

This photo about says how I'm feeling about toddlerhood after the past 3 days. AH! See the slightly crazed look in the eyes? The crazy unwashed hair-do? The ratty pajama tee still on. Yep, that's right. Nutty, whack-a-doo, punk monkey, toddler days.
I think the hubby is feeling the same. He also worked on my new wordpress blog. He is trying to customize it and move my archives. It is taking awhile.
Let's see.
I was trying to zone out for a bit and I started clicking NEXT BLOG and came across this weird little test. What kind of American English Do You Speak? I took it. It has like 15? questions and then tells you the breakdown of your language. I'm 50% normal Am. English and 25% Dixie etc. Dixie? really. My hubby was 40% normal and 35% Yankee. If you want a no brainer stupid thing to do...go take it. If you are not American it could be amusing to see what it tells you.

Commercialism:
On the music front, everytime we hear that Diet Coke commercial-you know the one with the chipper looking blonde girl on roller skates? She's drinking a coke and magic bubbles are floating all over and the song, "Starry Eyed Surprise"by Oakenfold plays? Well, we got that song downloaded and the husband plays it over and over and now the Keely wants to hear it over and over. Then, a week or so ago that Old Navy, stripes-all-around, commercial came on and then Friday Keely's says, "Want to hear Go Daddy-o". We knew what she was talking about so we downloaded that for her cd too. You can find it via here if you have any interest. So, all weekend we heard those two songs over and over and over. Oh help me. They are both happy, dancy songs...but shessh.

Bag #3

Here's my big weekend project: a two-toned bag. That's 3 bags in one week!!!! Whoa.
I told you I do not have any coordinating fabrics so this is the best I could do. It kinda matches. I mean, no one is going to be staring at my bag especially since I don't go anywhere. Well..except you...don't stare, k? 8-) I had some issues with the two-toned thing. Measuring is not a skill of mine. Trying to make them all line up and be even. Oi! The lining is significantly smaller than the inside, but oh well. Looks like a bag to me. Next attempt at a bag will involve interfacing I guess. I have fear.

Sunday, March 26, 2006

An arrival


My slacker swap package arrived Saturday and what a good thing it was. The terrible two's are back in full swing. Grrr. So, this goodie box from Capello came at a perfect time. The pink packages tied in lovely girly ribbon made me smile. Inside was: lovely fabric for me to play with, a little vase and pretty tea cup, a button jar 8-), chocolates (yum), and for Keely: a cute book, Hello Kitty erasers, and glitter bracelets which are mysteriously missing from this photo. Thank you Capello! I don't think either of us truly stuck to the "SLACKER" title. Ah well.

Friday, March 24, 2006

Weekend plans

1-Do something with this fabric:
This is one of the "new" fabrics that I bought awhile back. I think it's so flippin' cute, but I really don't know what to do with it. I thought it would be a cute kid something? Pillowcase? more bean bags? A kiddie bag? I was going to try and make a little blanket. It's only 1 yard, so it would be a baby blanket. Fish on the front and soft blue tee material on the back. I haven't made a blanket before so what's the scoop? Right sides together and just sew it up, leave a gap, turn it inside out and add a decorative stitch for kicks? Is it really that easy?
2-I may try out making one of those "yo-yo's" and see how that goes.
3-I was also thinking of attempting a two tone bag. You know, make the bottom 1/3 one material and the top 2/3 a different one. I don't know if I have anything that will coordinate. I'm a bit scared to try this. Too many cuts give me too many chances to mess it up.
The way things are looking from here I'll be lucky if I get one of these projects done.
Also, the hubby is going to look further into the wordpress thing.
I hope you all have a great weekend.

Thrifty Finds Friday

OH My! A pile of thrifty junk! What have I done? (Again, blogger has made a non-vertical photo) vertical. This is my living room floor after we got home from thrifting. Yikes! What an ordeal sorting, cleaning etc. But I got some good stuff for little money.

So, I haven't bought much in the way of toys things for awhile. That changed this week. Since there are no children around us, I am Keely's number one playmate. Mommy gets bored fast and needs new toys (cheap ones). Here's the breakdown.


Photo 1: Bag of animals. These are going to be designated for outside use. She has plenty inside. price-->$2.

Photo 2: The cool fabric veggies I mentioned yesterday. She played with these all last night.
price-->.99

the fabric finds

Box-o-sewing goodies

Buttons, ribbons, binding, zippers, lace. I NEVER find this kind of stuff.

the rest of the kiddie stuff


Photo 1: (left one) A little board and lots of magnets. They came together. One side of the board is magnetic/dry erase and the other side is a chalkboard. I thought this would be good for the car. It's pretty small. price--->$3.

Photo 2: Play dough accessories. What a mess that will be, huh? price-->$2.


Photo 3: One of our favorite books has been Mary Murphy's, I Like It When, so I was thrilled to find this big bag of wooden picture blocks. It's a matching game that has all the book characters on them. price--->$2.

Photo 4: I got this bag of dolls because of their clothes. They are pretty nice. I didn't realize they were all Disney characters until I opened the bag. I don't really do Disney. Keely doesn't know who they are so they are just dolls to her. She is having them dance all over my arms as I type this. price --->.99

Thursday, March 23, 2006

Girly delights

$4.oo for this bitty doll cradle.
I love it.
It needs to be painted because its current coat is flaking off everywhere. I am going to figure out how to make some bedding for it. A thick mattress covered in something cute. A pillow and matching blanket too. I wish I was my daughter. She's got everything dude.
When I got this yesterday, the store also had another little solid wood doll cradle and a old wooden doll highchair. It kills me to pass these little pretties up, but how many doll beds can one small house hold? If one of you lived near and had a little girl, I'd buy these kinds of things for you. Then I could have the satisfaction of the rescue, getting the cheap deal, not having to leave it at the store, and of giving it to someone who would love it. So, who's moving close?
Or maybe I just need an addition built onto my house.

Also, in bag related news, I took my fancy homemade bag out in public yesterday for its formal coming out. The springy flower one. It is perfect.
I must say though that I was scared to put my stuff in it and take it out. I thought that my seams would start popping out as I walked around and all my stuff would fall everywhere. My bag glory would be abruptly ended and I would start sobbing.
Thankfully, that did not happen. My sewing has held up. hallelujah.

pants are optional

The pantless wonder. I like this weird picture I took a few days ago. It's symbolic (in my eyes anyway). She is the center of my world. She gets almost all of my attention. My hand, showing my wedding ring, symbolizing my marriage to her daddy which- bullseye- produced sweet little her in the circle. She's sitting in a room of my grandparent's old house where I once sat as a child, where my biological father once sat. Life. Cyclical. Coming full circle in a way.

Hubby said I was just trying to show off my bling in this pic. Bling honey? Really now.

random updates

We finally got the missing sink parts and put the thing together. Cute huh? She even gets a window over her sink. How lucky is this kid? See the fruit on the window sill? Okay so it's kinda whited out, but that fruit is cool. I just got 'em at the thrift store. They're fabric. Homemade and cool. The corn has a peelable husk. The carrot leaves have wire in them and they bend. I like 'em.

In other news, I'm cancelling my typepad move and the hubby thinks Wordpress is the way to go. He says he'll do all the work for me. Uh-Okay! You do that. Perhaps this weekend?

It's Thursday and again I have not posted a "corners of my home" photo. I guess that has gone the way of the dinosaurs for me. I'm looking for a replacement weekly themed post now.

That "tutorial" yesterday wore me out. I was blogged out. Didn't even wanna look at the computer. Yet, here I am now. The kinderbot is asleep and this is one quiet activity I can do at this time of the day.

Wednesday, March 22, 2006

The Greatest Bag Tutorial EVER?


Alrighty, I'm gonna try this. I apoligize if this screws any other fellow newbie bag seamstresses up more than they already were. I don't think I should be telling anyone how to make a bag, but you asked for it, so here goes.

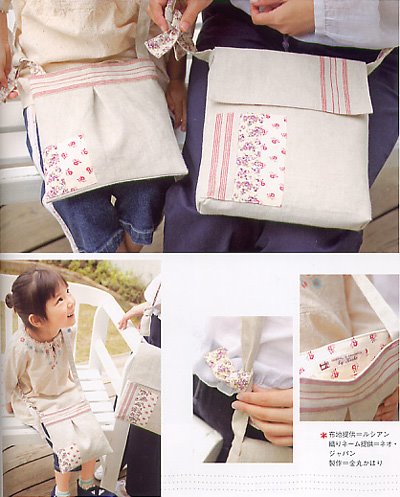
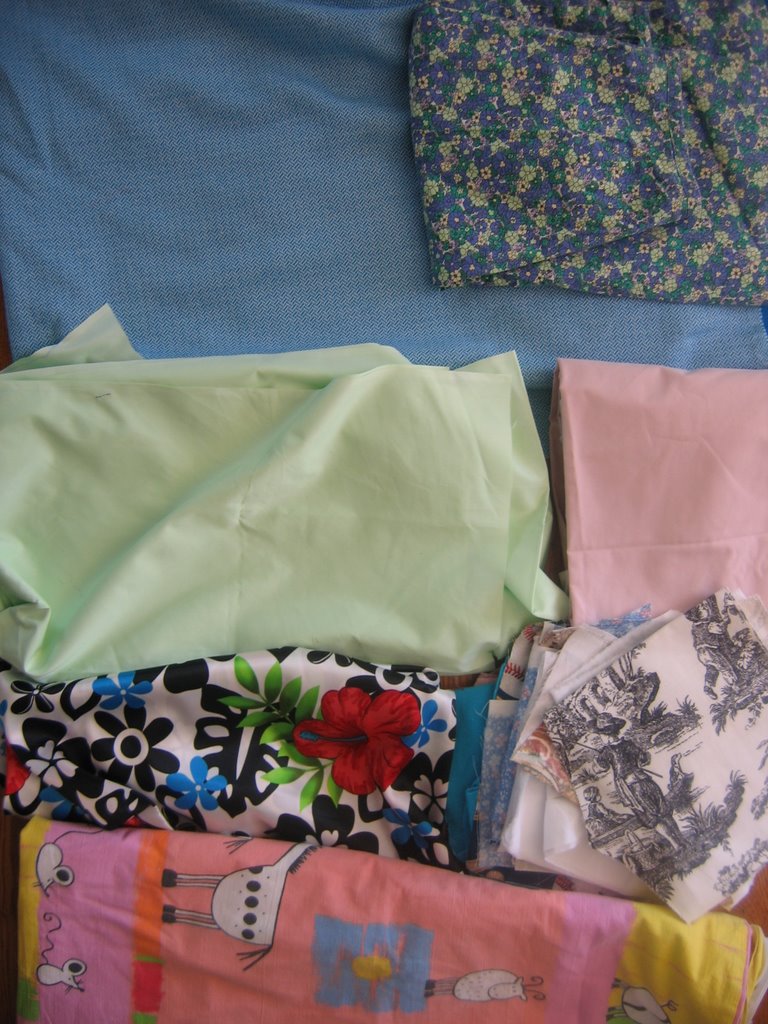
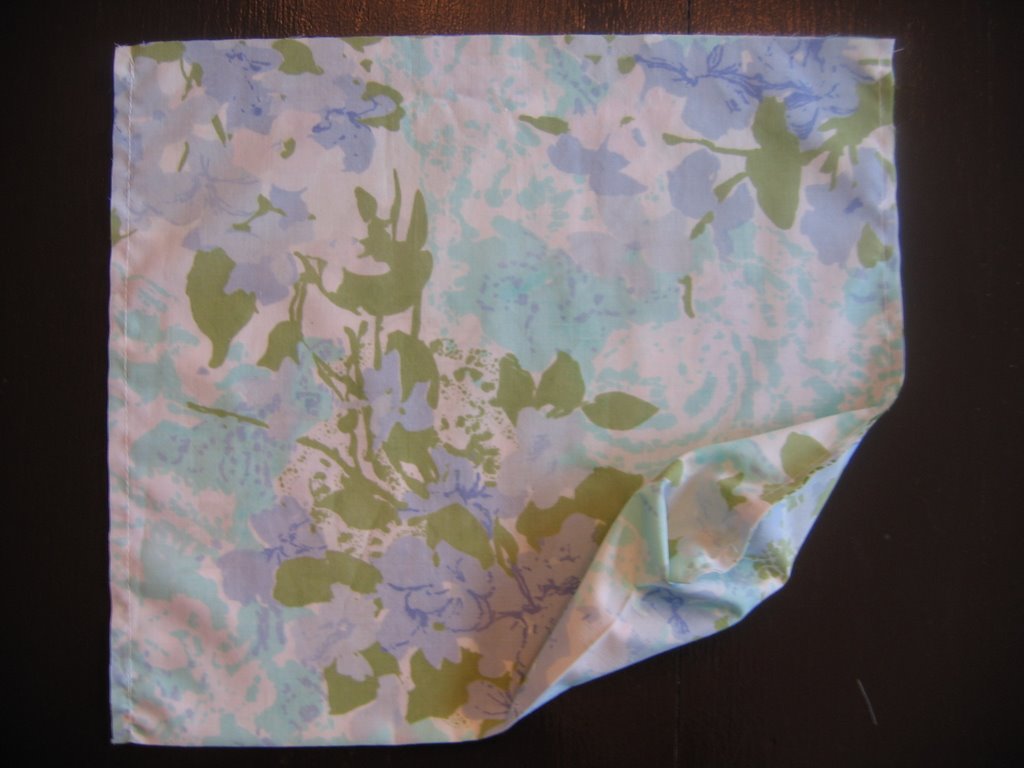
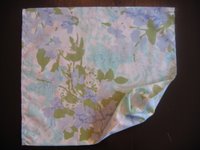
Photo 1:(the left one, blogger moved them weirdly) I cut my material. I based the size on my ugly corduroy bag seen in a previous post. I cut it so each side is 13 1/2 wide by 12" long. I folded the material so I wouldn't have to sew the bottom and just cut the two layers at once. You can do it this way or cut out 4 pieces to the size you want them to be. You'll either end up with 2 folded pieces or 4 individual pieces. Yes?

Then I cut two pieces of material for the straps. Each one 19 inches long by 4 inches wide. The first photo shows one raw strap and one that is already folded up ready for sewing.

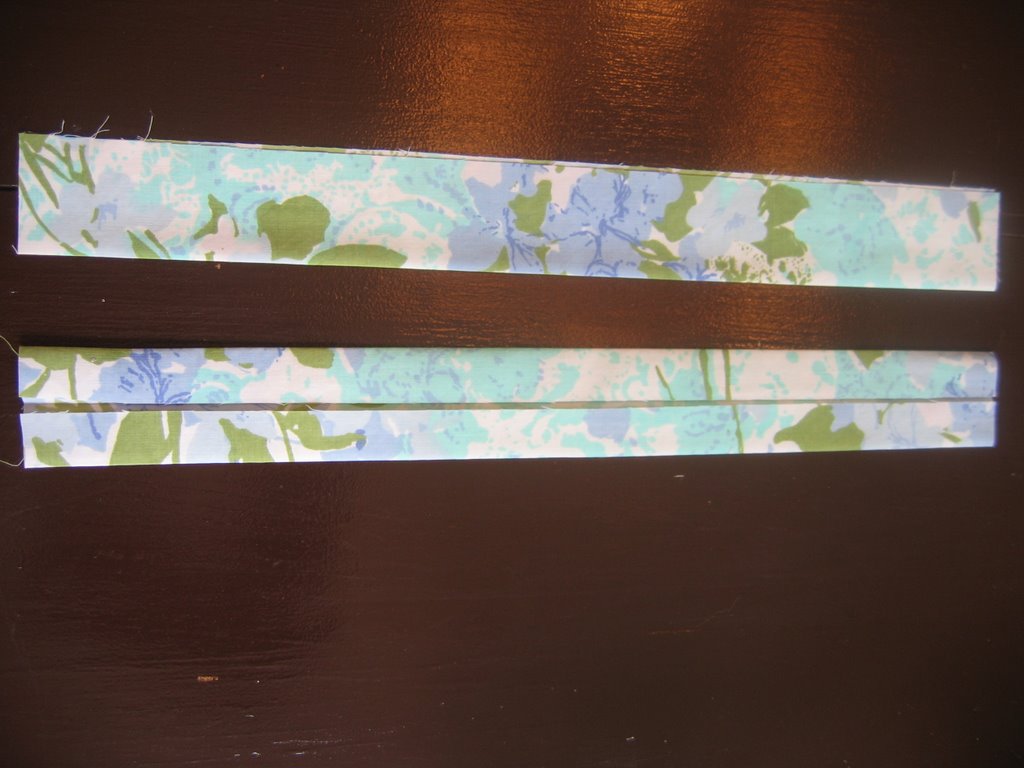
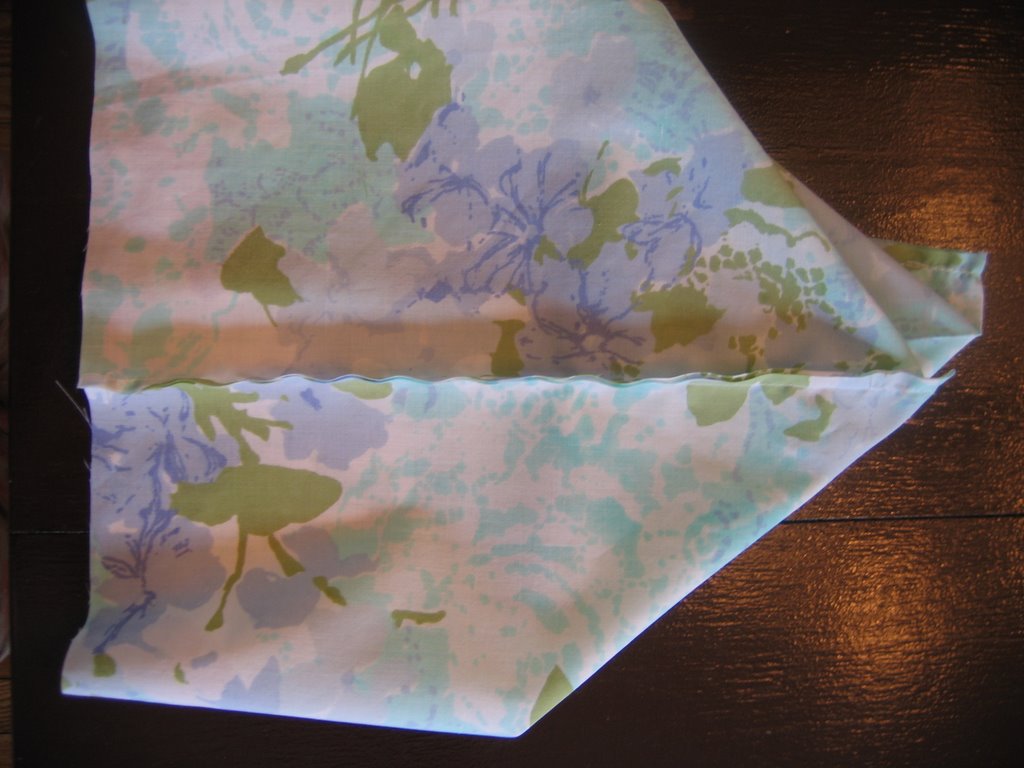
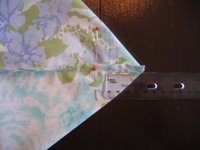
Photo 2: I went ahead and made my straps after cutting up all the pieces. Take each piece of 19x4 material and fold it in half. Iron it. Then open it and fold in each side to meet in the middle. Iron it. Now fold that in half so no raw edges are showing. Iron it again just for kicks.
Now, sew a seam up each side of the strap to make it look oh- so- professional. You can just sew up the "open" side if you want. slacker.

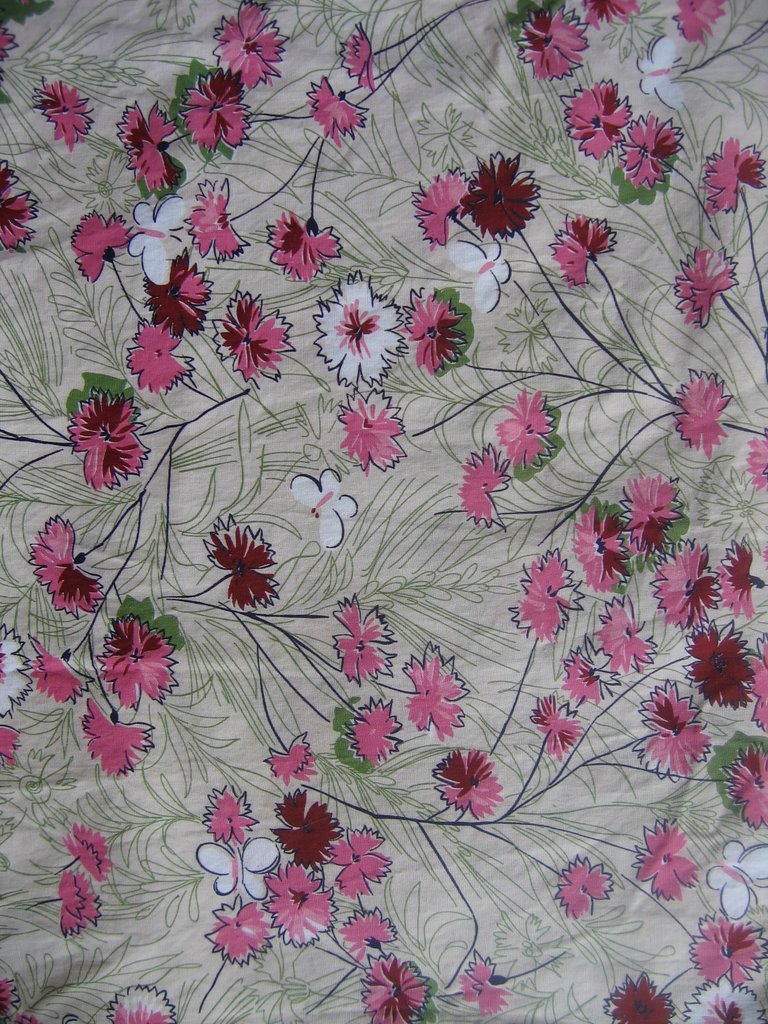
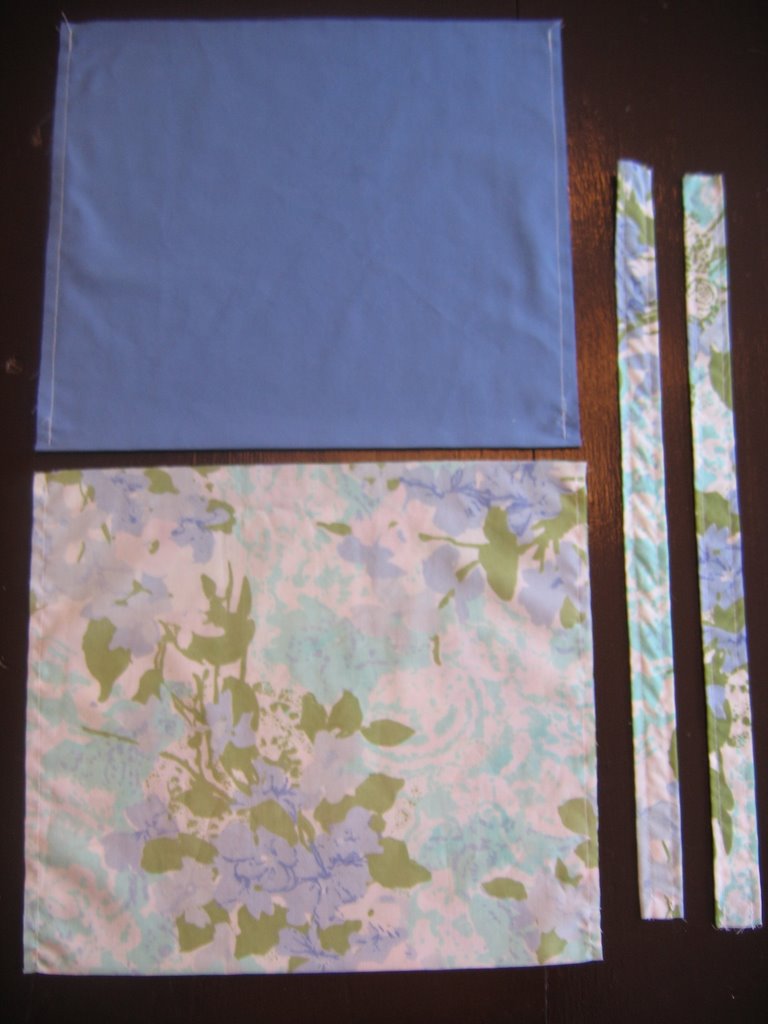
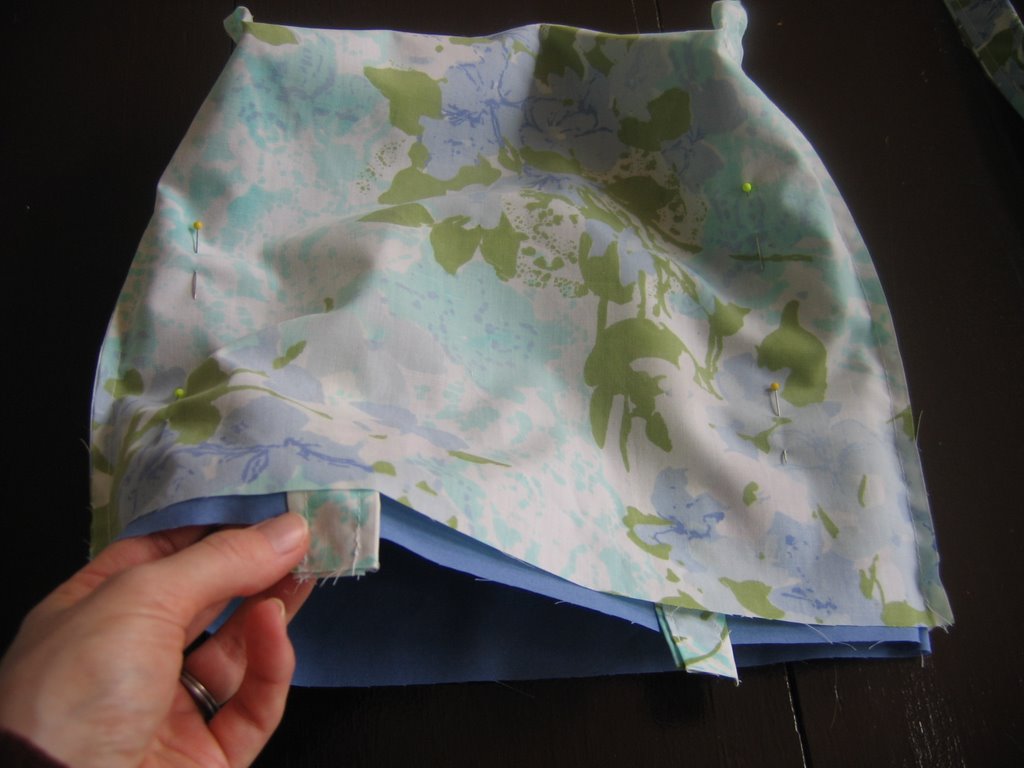
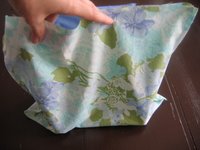
O.k you have two beautiful straps. Now, grab your bags outer material.Mine is the flowery patterned one. My lining is solid blue. Put the right sides facing each other before you sew up the seams. If you just cut one piece and folded it up in half then sew a seam up the right and left sides. If you cut two pieces for the bags outer then you need to also sew a bottom seam. So, go and sew some seams (1/4 inch seam allowance) on your outer bag and then on the lining. You should now have two bags and two straps. Yes? Just like photo 3.


<---photo 3 Now here I will attempt to explain the whole boxing out the bottom garbage. It took me weeks to figure this out from all the tutorials I read. I just didn't get it. Now, I know that it is because it is impossible to describe in words. I will try to and give you a few photos too. Take one of your bags and hold it up. Stick your hand in it along one of the side seams and push out the bottom corner with your fingers.

Now you are looking at the bag from the side.
You want to fold up the pointy corner at the bottom.


If that picture doesn't make sense- try this one:


Lay your bag flat. Pick up the bottom corner. Pull a little bit from the front piece out and then pull a little bit from the back out.
Now turn the bag so that the side seam is in the middle and facing you.
Are you getting this? Try using a piece of material just for practicing this step before you even begin to make the bag if you are still not following this.


Now. After you have magically "gotten" this tricky step. You need to measure up from each corner. I measured up 1 1/2 inches from each corner. Draw a straight line across and pin it in place. Repeat on the other corner and on the two corners of you other "bag".


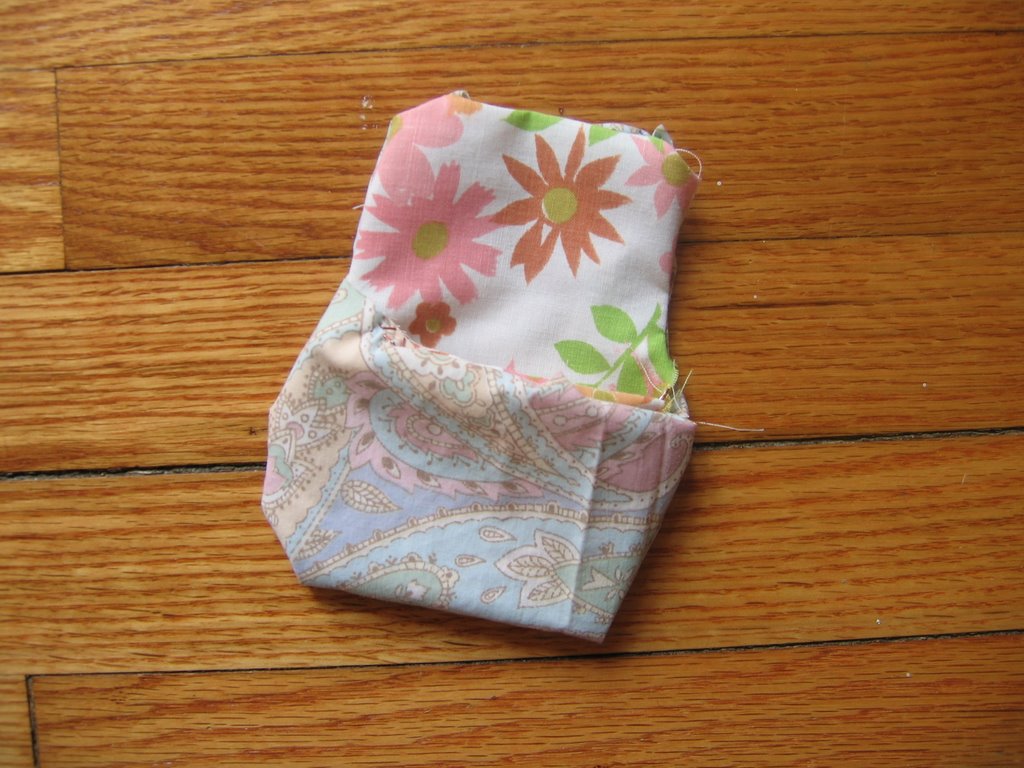
After all four corners are pinned , your bag should look like this; I think this is the photo I needed to see when I was trying to figure this out.


Get it?

Now, you need to sew those corner seams. All four of them. Go do it.
O.k now you have two little baggies wrong sides facing out and all four corners are stitched/boxed. yes?
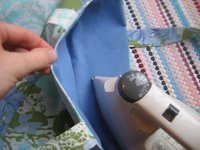
Now you need to take your lining and turn it inside out and stuff it into your outer bag. So the rights sides should be facing each other inside the "complete" bag. Line up the side seams. Pin the sides and the centers of the front and back.
Insert your handles on each side between the lining and the outside. Make sure all your handles are equal distance from the sides and they match up on both sides. Now pin them into place too. In the photo below, my straps are not pinned, but yours better be.;-)


Everything is pinned, so now you need to sew 1/4" from the edge. Make sure you leave a few inches opened (for pulling the bag right side out). I left the space between one of the handles opened.
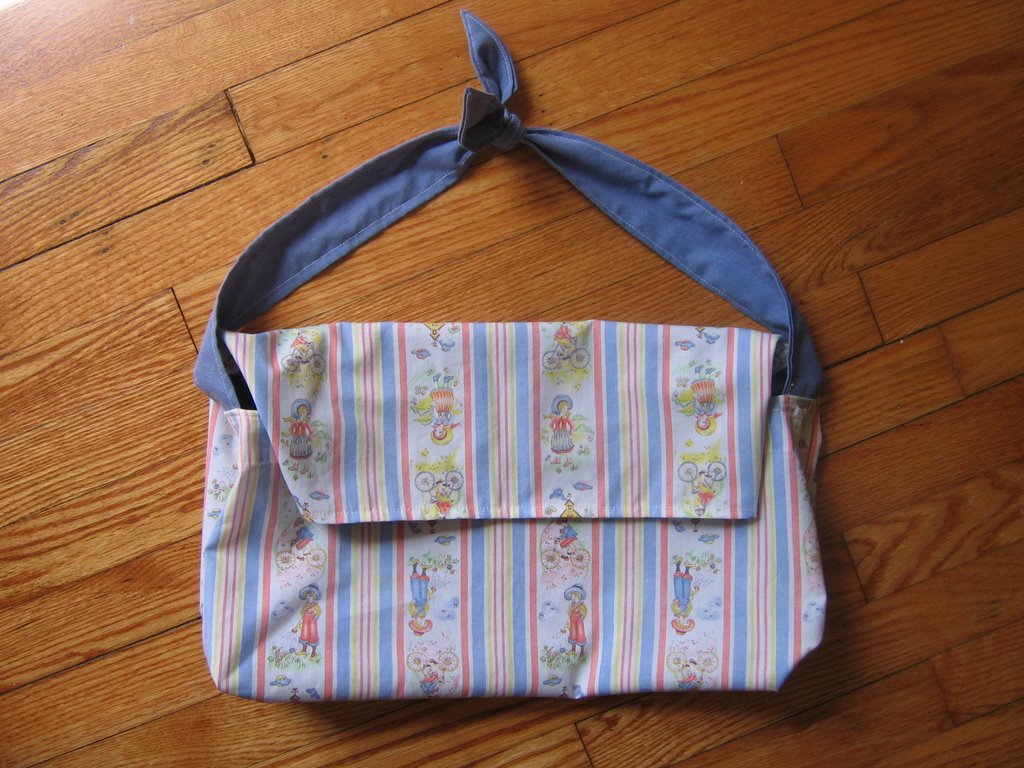
After you are done stitching the top, you can pull the bag right side out. You will see that it will look like a bag. At this point you may fall out of your chair from the shock of it all, as I did.
Admire your almost finished creation. You are almost done.

Make sure your lining is not sticking out over your outer bag. That's just ugly. If it is, stuff it back in and iron that sucker where you want it to stay. My lining on this bag was a bit longer than the outer and it was sticking out all ugly like. I think not. Fixed him.
Make sure you fold in the part that you left open between the straps so that the raw edge isn't sneaking out. Iron it all in place.


Pin that little open part in place just to be safe. Now go and do a beautiful final top stitch and you are all done. Now do a happy dance. You made a bag. At least I hope you did. If you did not and you are just sitting there with a raised eyebrow, scratching your head in wonder. I apologize. I tried. I really did.
I am finished. This took 1 1/2 to type and post all these photos in. Are you kidding me? That was way too much work. Blogger is killing me. Let me know how this went. No, scratch that...you might say that I am an idiot and did a horrible job explaining this and that this was the worst tutorial ever!
Only tell me if it went well. k? And that you love me. A lot.
Thanks and good luck.