The Greatest Bag Tutorial EVER?
Alrighty, I'm gonna try this. I apoligize if this screws any other fellow newbie bag seamstresses up more than they already were. I don't think I should be telling anyone how to make a bag, but you asked for it, so here goes.
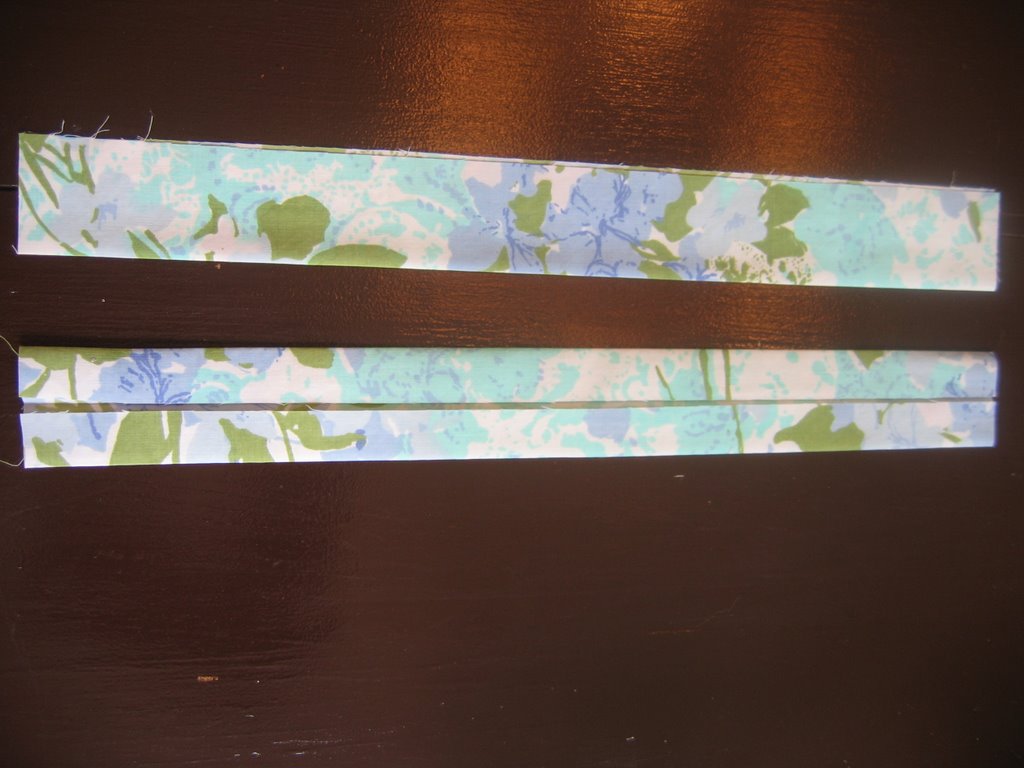
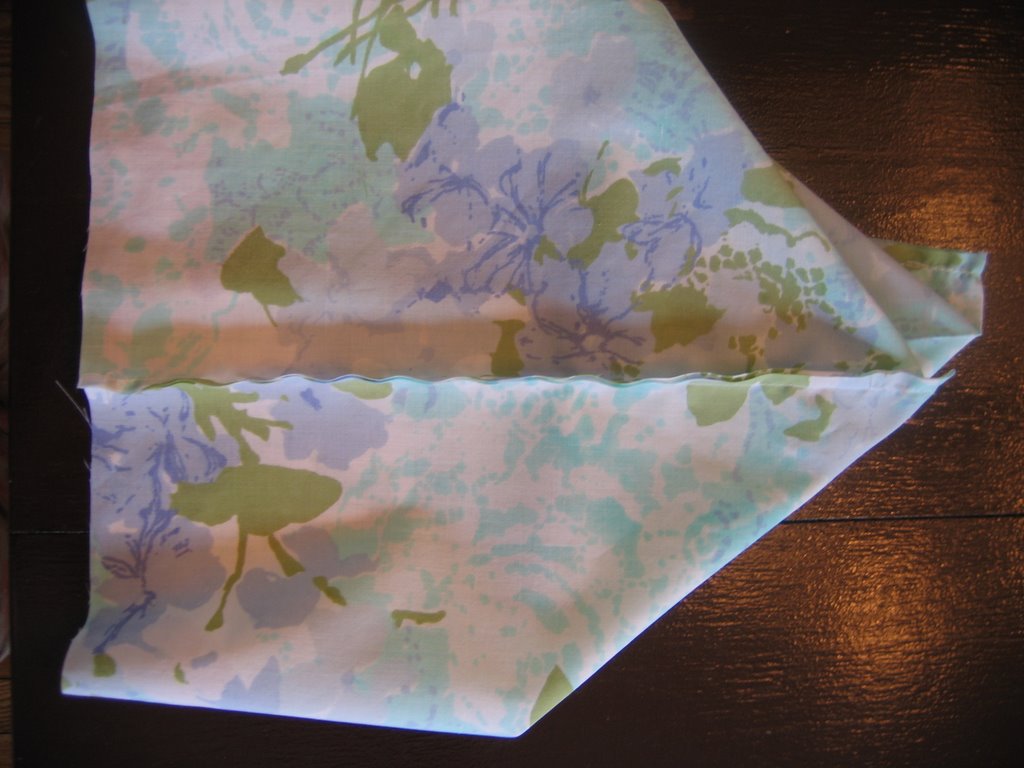
Photo 1:(the left one, blogger moved them weirdly) I cut my material. I based the size on my ugly corduroy bag seen in a previous post. I cut it so each side is 13 1/2 wide by 12" long. I folded the material so I wouldn't have to sew the bottom and just cut the two layers at once. You can do it this way or cut out 4 pieces to the size you want them to be. You'll either end up with 2 folded pieces or 4 individual pieces. Yes?
Then I cut two pieces of material for the straps. Each one 19 inches long by 4 inches wide. The first photo shows one raw strap and one that is already folded up ready for sewing.
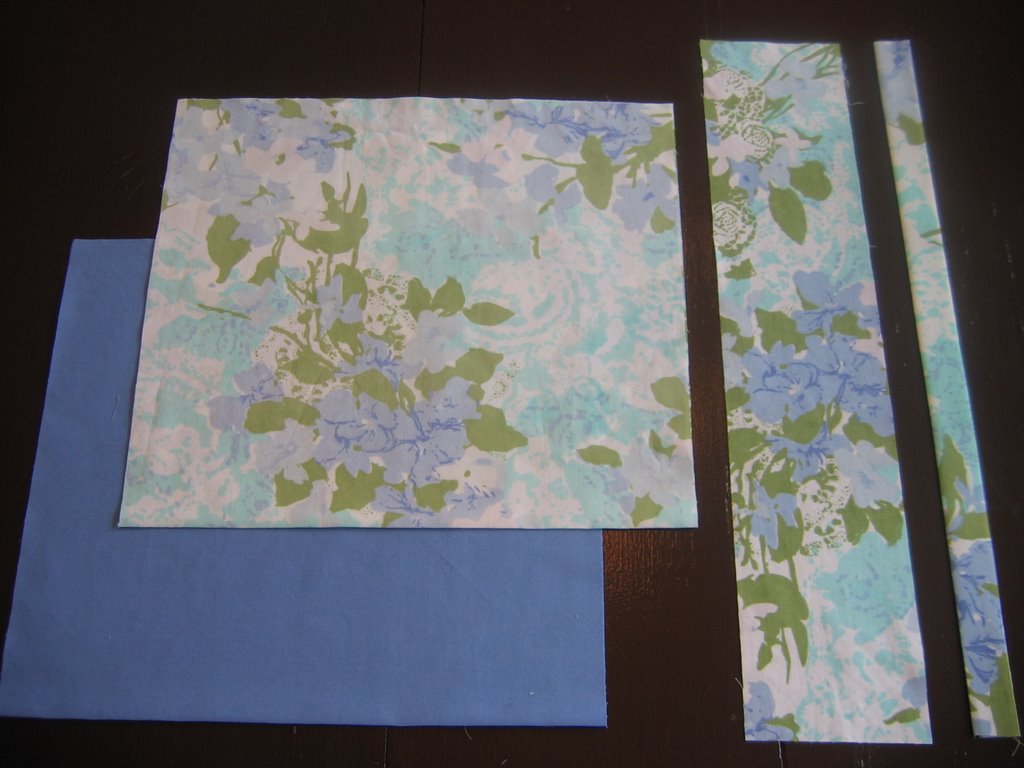
Photo 2: I went ahead and made my straps after cutting up all the pieces. Take each piece of 19x4 material and fold it in half. Iron it. Then open it and fold in each side to meet in the middle. Iron it. Now fold that in half so no raw edges are showing. Iron it again just for kicks.
Now, sew a seam up each side of the strap to make it look oh- so- professional. You can just sew up the "open" side if you want. slacker.
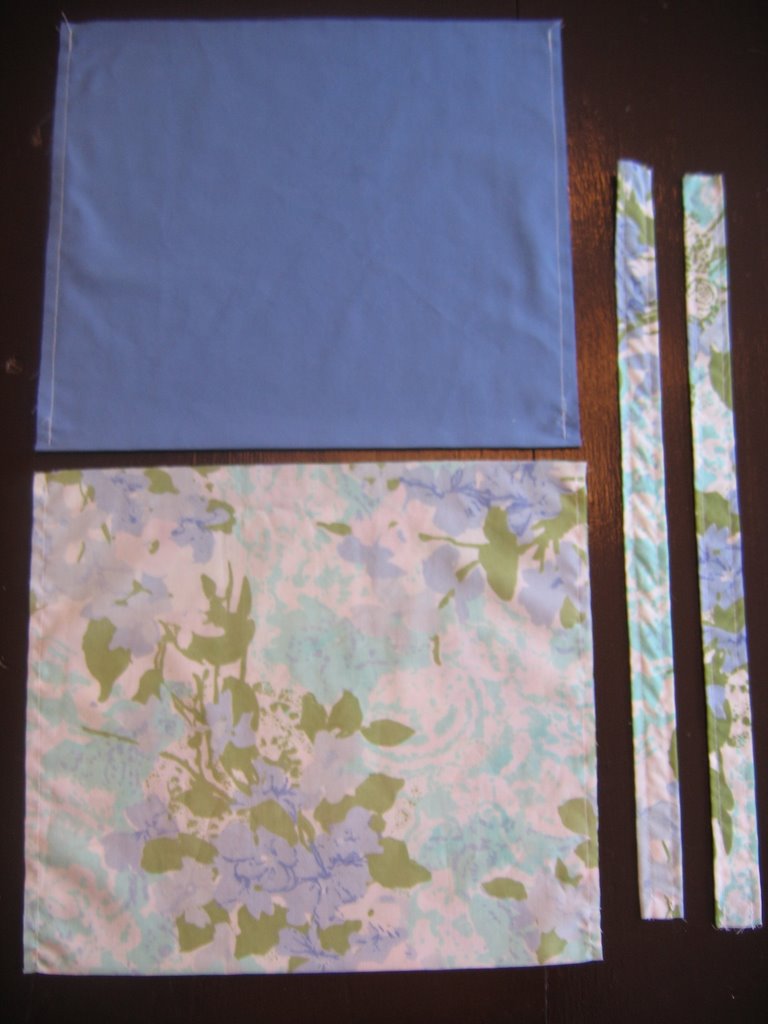
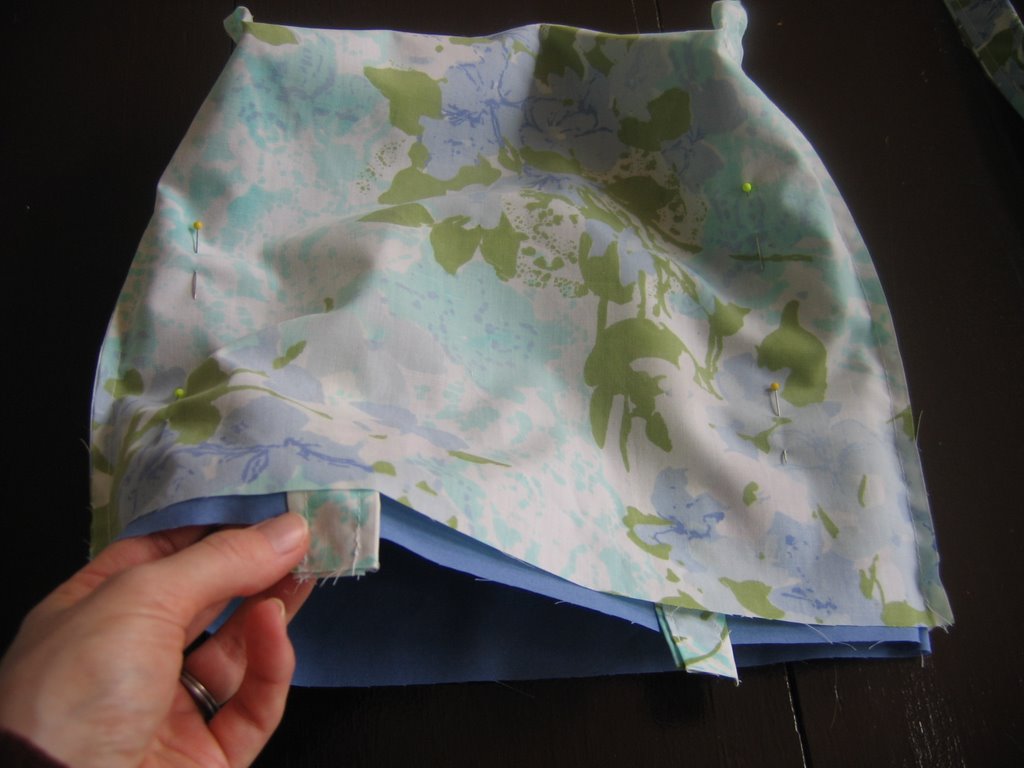
O.k you have two beautiful straps. Now, grab your bags outer material.Mine is the flowery patterned one. My lining is solid blue. Put the right sides facing each other before you sew up the seams. If you just cut one piece and folded it up in half then sew a seam up the right and left sides. If you cut two pieces for the bags outer then you need to also sew a bottom seam. So, go and sew some seams (1/4 inch seam allowance) on your outer bag and then on the lining. You should now have two bags and two straps. Yes? Just like photo 3.
<---photo 3 Now here I will attempt to explain the whole boxing out the bottom garbage. It took me weeks to figure this out from all the tutorials I read. I just didn't get it. Now, I know that it is because it is impossible to describe in words. I will try to and give you a few photos too. Take one of your bags and hold it up. Stick your hand in it along one of the side seams and push out the bottom corn
 er with your fingers.
Now you are looking at the bag from the side.
You want to fold up the pointy corner at the bottom.
If that picture doesn't make sense- try this one:
Lay your bag flat. Pick up the bottom corner. Pull a little bit from the front piece out and then pull a little bit from the back out.
Now turn the bag so that the side seam is in the middle and facing you.
Are you getting this? Try using a piece of material just for practicing this step before you even begin to make the bag if you are still not following this.
Now. After you have magically "gotten" this tricky step. You need to measure up from each corner. I measured up 1 1/2 inches from each corner. Draw a straight line across and pin it in place. Repeat on the other corner and on the two corners of you other "bag".
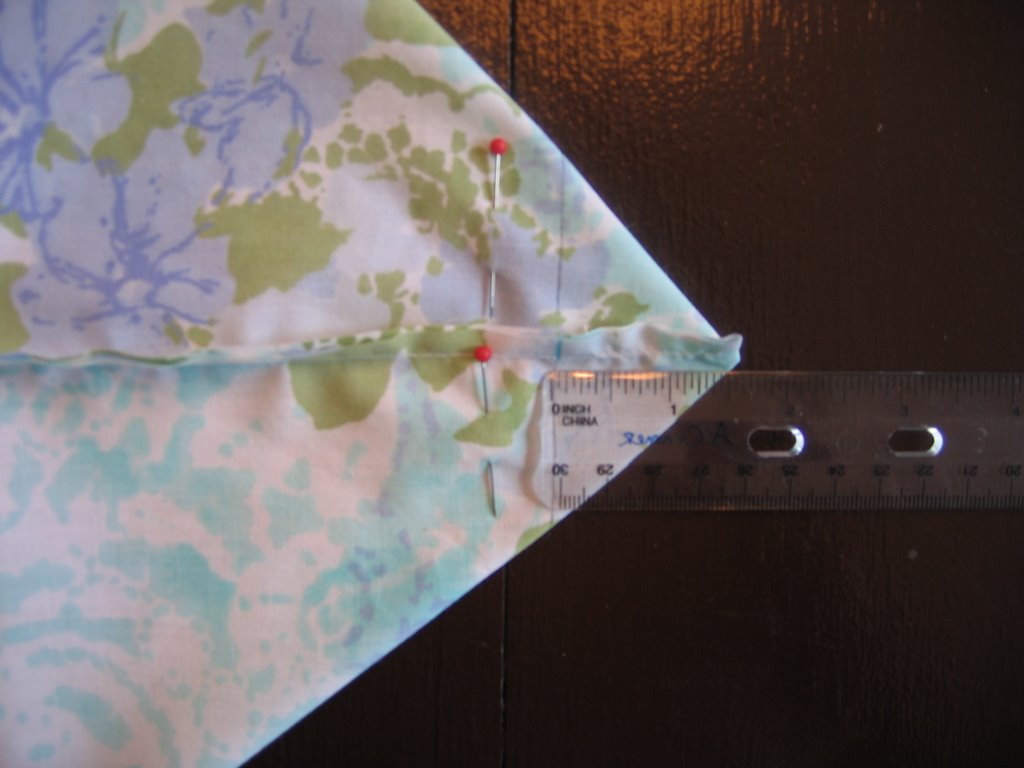
After all four corners are pinned , your bag should look like this; I think this is the photo I needed to see when I was trying to figure this out.

Get it?
Now, you need to sew those corner seams. All four of them. Go do it.
O.k now you have two little baggies wrong sides facing out and all four corners are stitched/boxed. yes?
Now you need to take your lining and turn it inside out and stuff it into your outer bag. So the rights sides should be facing each other inside the "complete" bag. Line up the side seams. Pin the sides and the centers of the front and back.
Insert your handles on each side between the lining and the outside. Make sure all your handles are equal distance from the sides and they match up on both sides. Now pin them into place too. In the photo below, my straps are not pinned, but yours better be.;-)
Everything is pinned, so now you need to sew 1/4" from the edge. Make sure you leave a few inches opened (for pulling the bag right side out). I left the space between one of the handles opened.
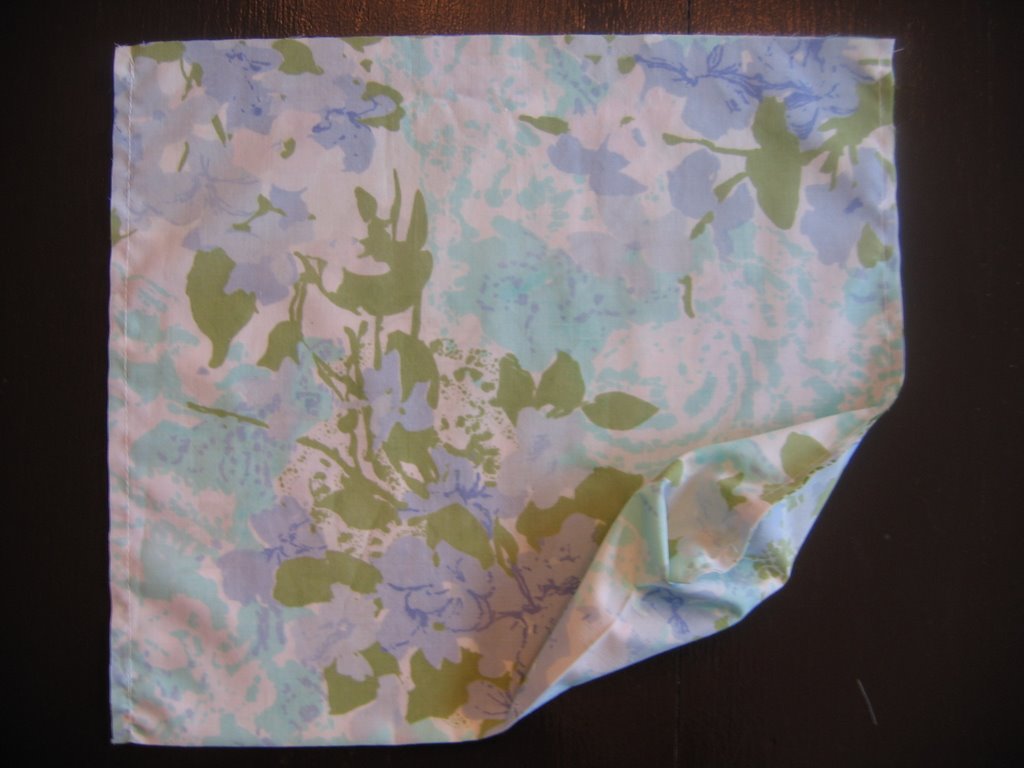
After you are done stitching the top, you can pull the bag right side out. You will see that it will look like a bag. At this point you may fall out of your chair from the shock of it all, as I did.
Admire your almost finished creation. You are almost done.
Make sure your lining is not sticking out over your outer bag. That's just ugly. If it is, stuff it back in and iron that sucker where you want it to stay. My lining on this bag was a bit longer than the outer and it was sticking out all ugly like. I think not. Fixed him.
Make sure you fold in the part that you left open between the straps so that the raw edge isn't sneaking out. Iron it all in place.

Pin that little open part in place just to be safe. Now go and do a beautiful final top stitch and you are all done. Now do a happy dance. You made a bag. At least I hope you did. If you did not and you are just sitting there with a raised eyebrow, scratching your head in wonder. I apologize. I tried. I really did.
I am finished. This took 1 1/2 to type and post all these photos in. Are you kidding me? That was way too much work. Blogger is killing me. Let me know how this went. No, scratch that...you might say that I am an idiot and did a horrible job explaining this and that this was the worst tutorial ever!
Only tell me if it went well. k? And that you love me. A lot.
Thanks and good luck.
posted by colorfool at 3/22/2006 02:18:00 PM
![]()

72 Comments:
I love you. A lot.
Happy?
That tutorial business is tough! Yikes.
Made sense to me... I'm making a bag soon.
I LOVE YOU I LOVE YOU I LOVE YOU I LOVE YOU!
a lot.
Now I have to try this! When will I have the time? I foresee a two am run-in in my near future (this doesn't qualify as a 15 minute deal; at least not for me!). Thank you thank you thank you. And did I mention I love you? A lot?
Thanks so much for the tutorial. I'm sure it was a lot of work to put it together. I'm going to try it out one of these days...and I'll let you know how it works (perfectly, I'm sure). Just wanted to let you know that I mentioned your quick craft flickr group on my blog today. :)
That's a lot of love. I like it. Thanks. I really want to see your results. k?
JOJO: Thank you. I've been trying to leave comments on your blog but it won't let me?
Looks like a great tutorial. Am dying to try some fun projects. I've been doing some long promised paded lens bags for my Dad's birthday and it has taken FOR friggin EVER. Anyway, I'll let you know how it turns out when I have a chance to make it.
Awesome, thanks so much. I don't just love you, I lurve you. That's extra love, lol. I may attempt to make it this weekend. Don't hold me to that, I'm a slacker, ya know.
Amy: great! I look forward to it!
Dee: Lurve. ha ha! 8-)
Enjoyed a lot!
Bras for the plus sized woman plus size lingerie South africa train trips
Thank you so much for this, am making dozens of these now to sell. Like you say, once you've got the idea. Got any other little baggy ideas?? ::)))
I have been looking for sites like this for a long time. Thank you! kids soccer apparel 1looking down blouses Business card credit fleet Tenuate pills order and ship for canada
You are my hero!
I've seen the 'pinch out the corner and then push it flat and turn around in a circle and sacrifice your first born' tutorials before and never been able to follow them. Thank you so much for putting up an idiot-proof one!
I am now the proud owner of a non-flat bag and I'm bookmarking this tutorial for later! :)
I'VE DONE IT! I'VE DONE IT!!
I am so happy...!!!
Didn't stop until I've finished it, had to undo the corners once but hey I ' VE DONE IT !!! and it looks great!
One day I would have the chance to post you a picture of it...
THANK YOU... and I DO LOVE YOU!!! Thank you for taking the time to put it all up there...and for the very last bit, its true you can't believe what you've made!! XXXXXX
Thank you so much for this info. I wanted to make "shopping bags" for everyone for Christmas this year (thinking "green" don't you know) and couldn't quite figure out the flat bottom thing. I taped one up with paper and tape and it worked lol. Tonight I make the real thing. I'm confident because your directions were fabulous. I'm not going to line my bags, but I am going to put a vinyl bottom on it. Wish me luck
Thank you so much. I've been trying on my own and seeing your photos made it all click into place. Now to make ten of these before Christmas!
Wow, this is fantastic! I've made a few today, changed the dimensions on one of them and now it's ready to be made pretty and packaged for christmas :D
Thanks for making handmade holidays so easy!
Hi!
I have been trying to figure the corners out for weeks! Thank you for a great tutorial!!! You are the best! I made a great bag!
I am 70 yrs old and have been doing this a longtime never sure on the corners, sure helped me to measure and get them the same..this makes the handbag sit stright.
Never to old to learn Thanks
Nanny Sweetie
thank you for your tutorial..
I'm going to try this
I did just about fall to the floor. It worked! I just started sewing and this was my 3rd project. I'm so excited! Thanks for the tutorial!
I am going to make the bag, you did a good job on the tutorial. I want to sew couple of pockets on the inside lining for cell phones, ect. Thanks a lot.
I just found your tutorial on Sunday and made a bag to match the outfit I've made for a wedding at the weekend. You can see it here: http://ohbloggineck.blogspot.com/2008/05/look-what-i-made.html
Thank you so much!
I laughed so hard when I read your instructions. THEY ARE GREAT. I haven't started to make a bag yet, but I will right now.......THANKS TO YOU. You explained everything so well that I have every confidence I can do it. And you did it with such a great sense of humor. You go girl! Thank again and God bless.
I enjoyed your honest tutorial - a LOT!! It made me laugh and inspired me too! Made me an arty-farty Tote!! Thanks for sharing!
Awesome, awesome! I just made my first bag ever and it was super easy with these instructions! Thanks!!
Thanks for posting these directions. I made a bag yesterday and posted about it here. You explained it very well and the photos really helped.
Great Job. The only problem I had (newbie)is I thought i had to sew the sides after squaring the bag bottom off because I was instructed to pin them.. Other than that, It was my 5th suceess at totes.
Oh My Goodness! I have tried so hard to figure out what another tutorial like this was talking about what with the whole corner things and you explained it perfectly for me to understand! I just hope I can repeat it! :D Thank you sooo much! :D
You Rock! I have been wanting to make a bag out of some old children's fabric for ages. This was so easy to understand. I din't sew the handles into the bag though. I sewed them onto the outside of the bag and added some big red buttons for decoration. Thanks again. Love you, love you, love you even though i don't know you :)
Guess what? I just made slipcovers using the corner-making technique and it worked OK.
Guess what? I just made slipcovers using the corner-making technique and it worked OK.
1 cool tutorial + 1 box of free designer fabric sample books = lots of designer tote bags to sell.
Thanks bunches!
Love you lots and lots and lots.
Thank you sooooooo muchly for this fantastic tutorial. You've made it look and sound easy enough even for me to try and to succeed. Yipee!!!!! Former Can't Sew, Won't Sew going to give sewing a try.
Marion
UK
PS Love you lots
I think you did a great job explaining it. I can't wait to make one tonight. I need a new Disney bag. I plan to add some pockets to the lining piece for cell phone, pen and autograph book. Thank you for the great pictures of the "boxing" procedure.
Worked great thanks!!
Great. Gotta go sew some. I've had some requests for totes. Thank you!
You clever clever girl. I am hopeless at sawing (well, almost). I needed to make a tote, lucky I found your tutorial and woila! Here it is:
www.ceasedtoexist1.blogspot.com
You are so wonderful for posting this! Thank you!
Thank you very much! You´re such a generous and skillful person. I´ve followed your clear instructions and finally managed to make a decent bag.
Greeting from Buenos Aires
It made perfect sense to me. Thanks! :)
You are very funny. I haven't made a bag using your tutorial, for I just found it this second, but I have to say ... this is one of the more entertaining tutes I've seen. Congratulations!
04-02-09
it might be useful if you actually PUT A PICTURE OF THE ACTUAL BAG. why would anyone want to make it if they didn't know what it looked like?
Your teaching skills are AWESOME!!! I could actually make something following your unique directions! Thank you, and now I'm gonna make a bag!
Your blog post is aptly named. This is the Great Bag Tutorial EVER! Love love love the directions and illustration. You the man!
best explained bag tutorial I have found yet....so now ill go try it.
You are a good person and it isnt difficult to say I LOVE YOU A LOT.:)
Zee
The tutorial is great. You should really remove the questions mark in your title. Don't doubt yourself. This rocks!
Thanks SO MUCH for this tutorial!!! Teaching me how to sew is PAINFUL, but you did it! Here's my tote and a shout out to you!
http://championofthesun.blogspot.com/
Turned out great. Thank you. I love you
this is soo great! this is my first attempt of making anything with the sewing machine IN MY LIFE and it turned out awesome, I LOVE YOU A LOT! =)
a true THANK YOU from Chile!
I hate those stupid boxed corners.. I ruined about 10 pieces of fabric trying to make them.. Then I found your page... And now I have a purse! I seriously was ready to give up and I decided to give it one more try and your pictures plus wording just made it click. I now have my first purse and am soooo inspired to make a million more! THANK YOU from the bottom of my beart!! You saved this girl from losing her sewing machine forever (it was about to get thrown out the window!)
Last night I spent 3+ hours on a tote bag for my daughter's laptop WITHOUT a pattern. I wish I would have had your directions - it would have been so easy. GREAT JOB explaining and the photos make it so much clearer. Thanks to you I'm ready for next time!
Love this tutorial and am now a bag-making machine! Love to give these as gifts (small on the go bag for diapers/wipes bottle, funky fabric for my daughter's girlfriends filled with their favorite stuff). I love you - Thanks for the help and very clear tutorial! I have e-mailed it to friends too!
im a little slow... but i love your bag. could you perhaps explain a little on how to do the lining? do i just make a secondish bag and flip iti nside out? im sorry its not your tut its me. i swear!
thanks! yours is the only one that clearly explains the flat bottom thing. fantastic!
well, I guess I thank you too now, you got soooo many comments, but I thought you should have a German one too ;)
Your tutorial is so easy to understand, very clearly and well pictured. It was well worth your time as you can see on all the nice comments :) No headscratching :)))
thanks a lot, Petra Berlin, Germany
I have been sewing bags for a month or more now, but I still remember your ending lines of "do a little dance now" because I still feel like dancing each time I finish a tote. Your tutorial, even before I was creating bags, was very inspiring and made sense. Though I have been sewing for three years before reading this and understood the language of sewing from the start of your tutorial. Thank you for the tutorial. I never get tired of reading yet another tutorial. Each colorful bag is always most inspiring. I like to make my totes around the same size as this one. They are addicting arent they?
All those pictures and there's not a one with the finished purse. Pity...I would love to have seen the finished product! But great explanation! Thanks!
This is the first tutorial I actually understood. Many thanks for this supreme effort. I know English tutors who would sell their right arms for such succinct and practical English usage. Not only clear but funny, too.
This is the first tutorial I actually understood. Many thanks for this supreme effort. I know English tutors who would sell their right arms for such succinct and practical English usage. Not only clear but funny, too.
aaawesome. thank you So much. After reading about a million tutorials that made no sense at all I finally went ahead and made a bag after yours. turned out great!
I just want to say thank you. This was a really good tutorial. I was able to follow it very well. You especially did GREAT describing in words and pictures- how to give the boxed look on the bottom of the bag. I got it on the first try!!!! Thanks again. By the way my bag turned out great!!
Thanks, the pics really helped. Any suggestions on how to make the bag a little stiffer so it can almost stand on it's own?
Wonderful. I just love how easy it is because of the way you have described each stage beautifully. I even made it in birthday paper to put small presents in. A bit tricky turning it the right way, but managed it. And it looked great as it matched the gift.. Thank you very much. Ivy
I currently make pillow case dresses for sale after following an easy tutorial and now customers are asking for other items; namely tote bags. I can't read patterns so your tutorial is perfect. Thank you so much for sharing! :)
You did an awesome job! I made one, no problem at all!
Although I have been sewing totes for years, I learned something new. It shows you CAN teach an old dog new tricks. (wink) I always left an opening in bottom or side of lining and had to hand sew it closed.(did not want stitches to show) This will be much easier from now on. Thank you, Thank you. And I love you lots!!!!
Thank you. After reading tons of other tutorials, a lot of head scratching, fur flying, ruined fabric throwing, and tears of frustration I finally found your tutorial. Made a bag based off of what you said and showed here. It WORKED! (Can you say "Happy Dancing!!!!!") Now I have a bag for college that will hold everything I need it to. Thank you so much! Yeppers I can honestly say I love you, a lot!
Candice, from Michigan
I can't tell you how many bags I have made now using this method. So many sizes and purposes! I recently added an inside pocket just for sass. The one I use the most is my first, and made to be used as my lunch sack for work!
hello amiga obrigada por partilhar,amo sua galeria,visite meu blog eme siga tambem ficaria honrada com sua presença por lá bjos,sucesso sempre.
HERMELA CRIS
http://gataarteirabycris.blogspot.com
Yes!! Absolutely the greatest bag tutorial ever!! I'm brand new at machine sewing but believe in researching a lot so I've been online and have a whole lotta diy tutes but urs is so awesome. It really did make it look easy n something I can tackle too...at this stage all I've done is a baby dress (which only a doll can wear), a lil girl skirt ( obviously very easy) and a bathroom curtain...! But, I'm so inspired with ur tutorial and all the great pics thatI want to make one right now! Thanx for the very simple to follow directions...
Sarita
N oh yes.... I loooooove you tons!!
Made one!! It's lovely and I did the happy dance! :) thank u....will post u a pic soon.
Post a Comment
<< Home